Support our educational content for free when you purchase through links on our site. Learn more
🏠 21 Critical Steps for Your New Home (2026)

The single most important thing to do when moving to a new home is to secure your safety and clean the empty space before unpacking a single box. While excitement tempts you to arrange furniture immediately, skipping these foundational steps can lead to costly repairs, security breaches, and a home that never feels truly fresh.
If you are wondering, “What are the most important things to do when moving to a new home?“, the answer lies in a strategic timeline that prioritizes locks, detectors, and deep cleaning over decor. We’ve seen families rush in, only to discover a hidden mold issue behind a sofa they’d already assembled, or worse, realize the previous owner’s key still worked on the front door.
Did you know that 80% of new homeowners regret not deep cleaning their new place before bringing in their belongings? It’s a statistic that haunts us at Moving Checklist™. One client, Sarah, moved her entire collection of vintage books into a dusty, uncleaned house, only to find them infested with silverfish within a week. She could have avoided the disaster with a simple, empty-house scrubdown.
Don’t let your new home become a source of stress. By following our proven 21-step roadmap, you transform chaos into a smooth transition.
Key Takeaways
- Prioritize Safety First: Immediately change the locks and test all smoke and carbon monoxide detectors before bringing in any furniture.
- Clean Before You Unpack: Perform a deep clean of the empty house to remove dust, pests, and previous owners’ grime from every surface.
- Know Your Systems: Locate water, gas, and electrical shut-offs and learn how to use them to prevent disaster.
- Live Before You Renovate: Give yourself permission to wait on major projects; observe how you use the space for a month before making changes.
- Document Everything: Start a running list of repairs and gather all home manuals and warranty information in one place.
Table of Contents
- ⚡️ Quick Tips and Facts
- 🏠 The Moving Mindset: Why Your First Week Sets the Tone
- 🔒 Week 1: Safety First, Locks, Detectors, and Shut-Offs
- 1. Change the Locks Immediately
- 2. Test Smoke and Carbon Monoxide Detectors
- 3. Locate Your Water, Gas, and Electrical Shut-Offs
- 4. Check for Leaks and Water Damage
- 5. Set Up Utilities and Update Your Address
- 🧼 Week 2: The Deep Clean Reset (Before You Unpack a Single Box)
- 6. Deep Clean Cabinets, Drawers, and Surfaces
- 7. Clean Your Appliances Inside and Out
- 8. Clean Refrigerator Coils for Efficiency
- 9. Scrub the Range Hood Filter
- 10. Clean Bathroom Exhaust Fans
- 1. Vacuum, Mop, and Start Fresh
- 12. Schedule Carpet Cleaning or Pest Control
- 🛠️ Week 3: The Walk-Through, Small Fixes, and Home Diagnostics
- 13. Patch Nail Holes and Wall Damage
- 14. Check and Repair Caulk and Grout
- 15. Test Doors and Windows for Drafts
- 16. Tighten Hardware and Fixtures
- 17. Start a Running List of Small Repairs
- 🧠 Week 4: Living in Your New Space and Planning Ahead
- 18. Start Noticing How You Use Your Home
- 19. Keep a Running List of Future Projects
- 20. Start Gathering Your Home Information
- 21. Give Yourself Permission to Wait
- 📦 What Can Wait? The Art of Strategic Procrastination
- 🧰 Homeowner Essentials: The Tool Kit You Actually Need
- 🌿 Seasonal Care: Protecting Outdoor Furniture and Landscaping
- 🔥 Critical Maintenance: Dryer Vents, HVAC Filters, and Air Quality
- 🚿 Tile and Grout Mastery: Cleaning and Sealing Porcelain
- 📝 Final Thoughts: You Did It!
- 🔗 Recommended Links
- 📚 Reference Links
⚡️ Quick Tips and Facts
Before we dive into the nitty-gritty of scrubing baseboards and wrestling with furniture, let’s hit the pause button for a second. Moving is chaotic. It’s a whirlwind of cardboard dust, existential dread, and the distinct smell of old carpet. But here’s the secret the pros at Moving Checklist™ know: the first 30 days define the next 30 years of your homeownership experience.
Did you know that 80% of new homeowners regret not deep cleaning their new place before unpacking? It’s true. Once your grandma’s heirloom sofa is in the living room, that “quick wipe down” becomes a “never-ending nightmare.”
Here are the non-negotiables you need to know right now:
| Task | Priority Level | Why It Matters |
|---|---|---|
| Change Locks | 🔴 Critical | You never know who has a spare key from the previous owner. |
| Test Detectors | 🔴 Critical | Smoke detectors have a lifespan; don’t assume they work. |
| Deep Clean Empty | 🟠 High | It is 10x easier to clean an empty house than a full one. |
| Locate Shut-offs | 🟠 High | A burst pipe at 2 AM is a disaster you can prevent. |
| Update Address | 🟡 Medium | Missing a bill or a package is annoying; missing a tax notice is not. |
Pro Tip: If you are reading this while still in your old house, take a screenshot of this list. If you are already in the new house, breathe. You can do this. But first, you need to know what to do before you start unpacking that “Kitchen” box.
For a deeper dive into the pre-move chaos, check out our guide on What do I need to do before moving? to ensure you aren’t leaving anything behind.
🏠 The Moving Mindset: Why Your First Week Sets the Tone
We’ve moved hundreds of families, and we’ve seen two types of new homeowners: the Panic Packer and the Strategic Settler.
The Panic Packer opens every box immediately. They try to set up the entire house in 48 hours. By day three, they are surrounded by a sea of tape and empty boxes, sleeping on an air mattress, and wondering why they ever thought this was a good idea.
The Strategic Settler? They treat the first week like a military operation. They know that unboxing is not the same as unpacking. They know that the house needs to be a canvas before they start painting it with their life.
Why does this matter? Because your mental state during the first week dictates your relationship with your new home. If you start with chaos, you’ll feel like the house is fighting you. If you start with order, the house feels like a partner.
“The house is not a project to be finished; it’s a home to be lived in. But you can’t live in a construction zone.” — Moving Checklist™ Team
So, how do you shift from Panic to Strategic? You need a timeline. You need to know that Week 1 is for survival, Week 2 is for cleanliness, and Week 3 is for repairs.
But wait… what if you skip the cleaning? What if you just move the couch in and call it a day? We’ll get to the horror stories of that later. For now, let’s talk about the one thing that keeps you safe before you even think about a sofa.
🔒 Week 1: Safety First, Locks, Detectors, and Shut-Offs
The moment you get the keys, your brain is screaming “UNPACK!” But your brain is lying to you. Your brain wants dopamine. Your house needs security.
1. Change the Locks Immediately
This is the golden rule of moving. Do not wait. Do not wait until you “get around to it.” Do it before you bring a single box inside.
Why?
- The previous owner might have given keys to friends, contractors, or family members who no longer live there.
- Real estate agents often keep a master key.
- You simply don’t know who has access.
How to do it:
- Option A (DIY): If you are handy, buy a re-keying kit. Brands like Kwikset and Schlage make these relatively easy. You’ll need the old key and the new key.
- Option B (Pro): Hire a locksmith. It costs money, but it’s cheaper than a break-in.
Real Story: We once moved a client into a beautiful Victorian home. They waited three days to change the locks. On day four, the previous owner’s ex-boyfriend showed up, thinking he still had a key. He didn’t get in, but the scare was enough to make our client sleep with a baseball bat for a week. Don’t be that client.
Action Item: Call a locksmith or buy a re-key kit today.
2. Test Smoke and Carbon Monoxide Detectors
You might think, “They worked for the last owner, so they’ll work for me.” Wrong.
Batteries die. Sensors get clogged with dust. And in many cases, the previous owner just took the batteries out to stop the annoying chirping and never put them back.
The Checklist:
- Press the “Test” button on every single detector.
- If it doesn’t scream, replace the battery immediately.
- If it’s a hardwired unit, check the backup battery.
- Carbon Monoxide (CO) detectors are non-negotiable. They save lives.
Expert Insight: According to the National Fire Protection Association (NFPA), most fire deaths happen in homes without working smoke alarms. Don’t gamble with this.
3. Locate Your Water, Gas, and Electrical Shut-Offs
Imagine this: It’s 2:0 AM. A pipe bursts in the bathroom. You are in your pajamas, soaking wet, and you have no idea where the water comes from. Panic mode: Activated.
You need to know where the main water shut-off is before the crisis.
- Water: Usually located in the basement, utility room, or near the water heater. In warmer climates, it might be outside near the foundation.
- Gas: Look for a valve on the gas line entering the house. If you smell gas, leave the house immediately and call the fire department. Do not flip switches.
- Electricity: Find the breaker box. It’s often in the garage, basement, or a closet. Label the breakers if they aren’t already. This is a lifesaver when a circuit trips at 3 AM.
Pro Tip: Take a photo of your breaker panel with your phone and save it to your “Home Info” folder.
4. Check for Leaks and Water Damage
While you are looking for shut-offs, look up. Literally.
- Ceilings: Look for brown spots, bubling paint, or saging drywall. These are signs of past (or present) leaks.
- Windows: Check the frames for condensation or rot.
- Basement/Crawlspace: Look for standing water or mold.
If you find something, document it with photos. This is crucial for your insurance and for negotiating repairs with the seller if you haven’t closed yet, or for planning your budget if you have.
5. Set Up Utilities and Update Your Address
You can’t shower without water, and you can’t work without internet.
- Utilities: Contact your local providers for electricity, gas, water, and trash. Do this before closing if possible. As Realtor.com notes, sellers often turn these off on closing day.
- Internet: Research local providers. Availability varies by ZIP code. Don’t wait until you are sitting in the dark to realize you can’t get fiber.
- Address Update: Use the USPS Change of Address service. It costs a small fee to verify your identity, but it’s essential.
Don’t forget:
- Banks and credit card companies.
- Insurance providers (auto, health, life).
- Subscription services (Netflix, Amazon Prime, meal kits).
- Friends and family!
🧼 Week 2: The Deep Clean Reset (Before You Unpack a Single Box)
Okay, you’re safe. The locks are changed, the detectors are screaming (in a good way), and you know where the water stops. Now, the moment you’ve been dreading: The Clean.
Here is the hard truth: You will never clean this house as well as you can right now.
Once your furniture is in, you have to move it to clean behind it. Once your clothes are in the closet, you can’t clean the shelves properly. Once your kids’ toys are scattered, the floor is a minefield.
The Golden Rule: Clean the house empty.
6. Deep Clean Cabinets, Drawers, and Surfaces
Start from the top and work your way down.
- Cabinets: Remove everything. Wipe down the inside with a degreaser. The previous owner might have spilled spaghetti sauce in 2019 and never cleaned it.
- Drawers: Vacuum out the crumbs. Wipe the tracks.
- Surfaces: Wipe down baseboards, window sills, and light switches.
Why? You want to know exactly what you are putting your food and clothes into.
7. Clean Your Appliances Inside and Out
The previous owner’s dirty fridge is not your problem. It’s your responsibility.
- Refrigerator: Defrost if needed. Clean the coils (more on that in a minute). Wash the shelves.
- Oven/Range: Scrub the burners and the inside of the oven. If it’s a self-cleaning oven, run the cycle.
- Dishwasher: Run an empty cycle with a dishwasher cleaner like Affresh to remove grease and buildup.
👉 Shop Cleaning Supplies on:
8. Clean Refrigerator Coils for Efficiency
This is a task most people skip, but it’s a game-changer for your energy bill.
Dust and pet hair accumulate on the coils (usually at the back or bottom of the fridge), making the motor work harder.
How to do it:
- Unplug the fridge.
- Locate the coils (check the manual or look behind the kickplate).
- Use a coil brush or a vacuum with a brush attachment to remove the dust.
Result: Your fridge will run quieter and use less electricity.
9. Scrub the Range Hood Filter
Grease builds up in range hood filters faster than you think. If you don’t clean it, it becomes a fire hazard.
- Metal Filters: Soak them in hot, soapy water with a degreaser (like Dawn). Scrub with a brush.
- Charcoal Filters: These usually need to be replaced, not cleaned. Check your manual.
10. Clean Bathroom Exhaust Fans
Dust and lint clog these fans, making them useless. If they don’t work, you’ll get mold.
- Remove the cover.
- Vacuum the fan blades.
- Wash the cover in the sink.
1. Vacuum, Mop, and Start Fresh
Now that the high-traffic areas are done, hit the floors.
- Vacuum: Get into every corner. Use the crevice tool for baseboards.
- Mop: Use a floor cleaner appropriate for your flooring type (hardwood, tile, laminate).
- Windows: Wash the inside of the windows. It makes a huge difference in the light.
12. Schedule Carpet Cleaning or Pest Control (If Needed)
If you have carpets, steam clean them before you bring in your furniture. You don’t want to trap dirt under your new rug.
If you see signs of pests (droppings, holes in walls), call a pest control professional immediately. Don’t wait.
👉 Shop Vacuum Cleaners on:
- Shark Navigator: Amazon | Walmart
- Dyson V15: Amazon | Dyson Official
🛠️ Week 3: The Walk-Through, Small Fixes, and Home Diagnostics
You’ve cleaned. You’ve scrubed. Now, it’s time to play detective. This week is about diagnosing your new home.
13. Patch Nail Holes and Wall Damage
The previous owner probably left a few holes. Maybe they hung a TV, or a painting, or a shelf.
- Small Holes: Use spackle and a puty knife. Sand it smooth.
- Large Holes: You might need a patch kit.
- Paint: If you plan to paint, do it now. It’s easier to paint an empty room than a furnished one.
14. Check and Repair Caulk and Grout
Look at your bathrooms and kitchen. Is the caulk peling? Is the grout cracked?
- Caulk: Remove old caulk with a utility knife. Apply new silicone caulk.
- Grout: If it’s stained, try a grout cleaner. If it’s cracked, you might need to re-grout.
Why? Bad caulk leads to water damage. Water damage leads to mold. Mold leads to expensive repairs.
15. Test Doors and Windows for Drafts
Close all the windows and doors. Feel for drafts.
- Drafts: If you feel cold air, you might need weatherstripping or new caulk.
- Operation: Do all the windows open and close smoothly? Do the doors latch properly?
Tip: If a door sticks, it might be a humidity issue. If it’s a constant problem, you might need to plane the door or adjust the hinges.
16. Tighten Hardware and Fixtures
Lose dorknobs, wobbly cabinet handles, and shaking light fixtures are annoying.
- Grab a screwdriver.
- Tighten every screw you can find.
- If a screw is stripped, use a longer screw or a toothpick and glue to fill the hole.
17. Start a Running List of Small Repairs
You will find things that need fixing. Write them down.
Don’t rely on your memory. You will forget. Use a notebook, a whiteboard, or an app like Trello or Notion.
- “Fix leaky faucet in guest bath.”
- “Replace broken window screen.”
- “Paint the trim in the hallway.”
🧠 Week 4: Living in Your New Space and Planning Ahead
You’ve survived the first three weeks. You’re starting to feel at home. But don’t stop now. This week is about observation and planning.
18. Start Noticing How You Use Your Home
How do you actually move through the house?
- Do you find yourself bumping into furniture?
- Is the kitchen workflow awkward?
- Do you need more outlets in the living room?
Action: Live in the space for a few days without moving anything. Just observe.
19. Keep a Running List of Future Projects
You might want to renovate the kitchen, add a deck, or paint the exterior.
- Prioritize: What needs to be done now? What can wait?
- Budget: Start saving for these projects.
- Research: Look up contractors, materials, and permits.
20. Start Gathering Your Home Information
Create a Homeowner’s Binder (digital or physical).
- Warranties: For appliances, roof, windows.
- Manuals: Keep them in one place.
- Contact Info: Plumber, electrician, HVAC, landscaper.
- Maintenance Schedule: When to change filters, clean guters, etc.
21. Give Yourself Permission to Wait
This is the most important tip. You don’t have to do everything at once.
It’s okay to live with a box of books for a month. It’s okay to not have the perfect decor. It’s okay to eat takeout for a week.
Moving is a marathon, not a sprint. Give yourself grace.
📦 What Can Wait? The Art of Strategic Procrastination
We’ve talked about what you must do. Now, let’s talk about what you don’t have to do yet.
- Decorating: You can wait until you know how the light hits the rooms.
- Major Renovations: Unless it’s a safety issue, wait. Live in the house first.
- Organizing the Garage: It can wait.
- Buying New Furniture: You might find you don’t need that extra chair.
The Rule: If it doesn’t affect your safety, sleep, or hygiene, it can wait.
🧰 Homeowner Essentials: The Tool Kit You Actually Need
You don’t need a warehouse full of tools. But you do need the basics.
The Must-Haves:
- Screwdriver Set: Phillips and flathead.
- Hamer: A 16-ounce claw hammer.
- Adjustable Wrench: For plumbing.
- Pliers: Needle-nose and slip-joint.
- Tape Measure: 25-foot.
- Level: A small 9-inch level.
- Utility Knife: For opening boxes and cutting materials.
- Flashlight: With extra batteries.
- Stud Finder: For hanging pictures.
👉 Shop Tool Kits on:
- Craftsman 230-Piece Set: Amazon | Lowe’s
- Stanley FatMax: Amazon | Home Depot
🌿 Seasonal Care: Protecting Outdoor Furniture and Landscaping
If you have a yard or patio, don’t ignore it.
- Teak Furniture: If you have teak, it needs to be cleaned and oiled to prevent graying.
- Landscaping: Check your plants. Are they dying? Do you need to mulch?
- Gutters: Clean them before the leaves fall.
Tip: If you have a pool, get a professional to open it or close it depending on the season.
🔥 Critical Maintenance: Dryer Vents, HVAC Filters, and Air Quality
Your air quality matters.
- Dryer Vents: Clean the lint trap after every load. Deep clean the vent at least once a year. A clogged vent is a fire hazard.
- HVAC Filters: Change them every 3 months (or more often if you have pets).
- Air Quality: Consider an air purifier if you have allergies.
👉 Shop Air Filters on:
- Filtrete Filters: Amazon | Home Depot
- Coway Air Purifier: Amazon | Coway Official
🚿 Tile and Grout Mastery: Cleaning and Sealing Porcelain
If you have tile floors, you need to know how to care for them.
- Cleaning: Use a pH-neutral cleaner. Avoid acidic cleaners on natural stone.
- Sealing: Grout needs to be sealed every 1-2 years to prevent staining.
Pro Tip: Test a small area before applying any new cleaner or sealer.
📝 Final Thoughts: You Did It!
You made it through the first month. You changed the locks, you cleaned the coils, you patched the holes, and you didn’t lose your mind.
You are a homeowner now.
It’s not perfect. There are still boxes in the hallway. There’s a squeaky door. But it’s yours.
Take a deep breath. Look around. You did this. And now, you’re ready to make it a home.
Conclusion

Moving to a new home is one of the most stressful yet rewarding experiences of your life. By following a structured timeline—prioritizing safety in Week 1, deep cleaning in Week 2, and diagnostics in Week 3—you transform a chaotic process into a manageable journey.
Key Takeaways:
- Safety First: Change locks and test detectors immediately.
- Clean Empty: Never unpack before deep cleaning.
- Observe First: Live in the space before making major changes.
- Be Patient: Give yourself permission to wait on non-essential tasks.
We’ve seen too many people rush and regret it. Don’t be one of them. Take your time, enjoy the process, and remember: your home is a journey, not a destination.
If you found this guide helpful, you might also want to check out our DIY Moving Tips for more advice on saving money and staying organized.
🔗 Recommended Links
Essential Tools & Supplies:
- Locksmith Services: Angi (formerly Angie’s List) | Thumbtack
- Cleaning Supplies: Amazon | Walmart
- Tool Kits: Home Depot | Lowe’s
- Air Purifiers: Coway Official | Dyson Official
Books & Guides:
- The Complete Guide to Home Maintenance by Black & Decker: Amazon
- Organizing from the Inside Out by Julie Morgenstern: Amazon
📚 Reference Links
- National Fire Protection Association (NFPA): Home Fire Safety
- USPS Change of Address: Movers Guide
- Realtor.com: Moving Checklist: Things to Do Before Moving
- JK Moving: 20 Things After Moving Into a New House
- The DIY Playbook: First Time Homeowner Checklist (Note: This page currently redirects to a newsletter signup, but the concept of a checklist is widely referenced in home maintenance literature).
FAQ

How can a checklist app help me stay organized during a move?
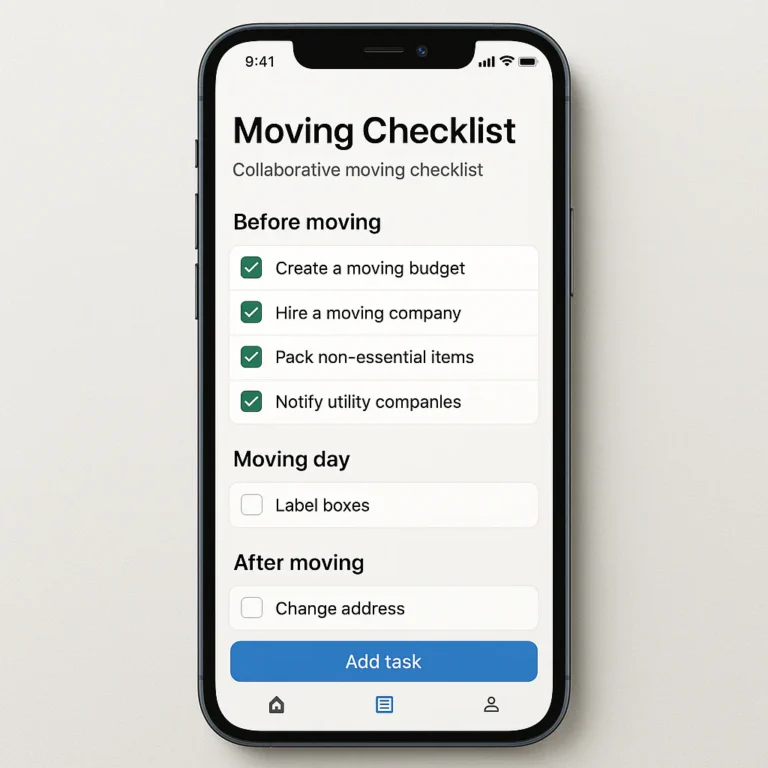
A checklist app like Moving Checklist™ acts as your digital command center. It breaks down the overwhelming process of moving into manageable, daily tasks. Instead of trying to remember 50 things at once, you focus one item at a time. It also allows you to track progress, set reminders, and share the list with family members or roomates, ensuring everyone is on the same page.
Read more about “🚚 The Ultimate Relocation Checklist for Beginners (2026)”
What are the essential items to pack first when moving to a new home?
You should pack an “Essentials Box” containing:
- Toiletries (tothbrush, soap, toilet paper).
- A change of clothes for 2-3 days.
- Medications.
- Phone chargers.
- Basic tools (screwdriver, hammer).
- Cleaning supplies (paper towels, all-purpose cleaner).
- Snacks and water.
- Important documents (ID, lease/mortgage papers).
Read more about “🏠 The Ultimate 30-Step Checklist for Moving Out of an Apartment (2026)”
How do I create a moving timeline to avoid last-minute stress?
Start your timeline 8 weeks before your move.
- 8 Weeks: Declutter, research movers, book services.
- 6 Weeks: Start packing non-essentials, notify utilities.
- 4 Weeks: Pack more items, confirm moving details.
- 2 Weeks: Pack most items, change address.
- 1 Week: Pack essentials, clean empty house.
- Moving Day: Execute the plan.
Read more about “🏠 The Ultimate Hassle-Free Moving Apartment Guide (2026)”
What digital tools can simplify the process of updating my address?
- USPS Change of Address: The official government tool forwarding mail.
- Moving Checklist™ App: Helps track address updates for banks, subscriptions, and friends.
- Google My Business: If you have a business, update your location.
- Social Media: Update your location on Facebook, Instagram, etc.
Read more about “🚚 What to Do 7 Weeks Before Moving: The Ultimate 7-Step Checklist (2026)”
Why is it important to deep clean before unpacking?
Deep cleaning before unpacking ensures that you are not trapping dirt, dust, or pests under your furniture. It also gives you a fresh start, making the new house feel like a clean slate rather than a used space. It is significantly easier to clean an empty room than a furnished one.
Read more about “🚀 How to Pack and Move in 2 Weeks: The Ultimate 14-Day Survival Guide (2026)”
What should I do if I find a leak or damage after moving in?
Document the damage with photos and videos immediately. Contact your landlord (if renting) or your home inspector/insurance (if buying) to determine the next steps. If it’s a plumbing emergency, locate the main water shut-off and turn it off to prevent further damage.
Read more about “🚚 15 First-Day Moving Essentials You Can’t Live Without (2026)”